
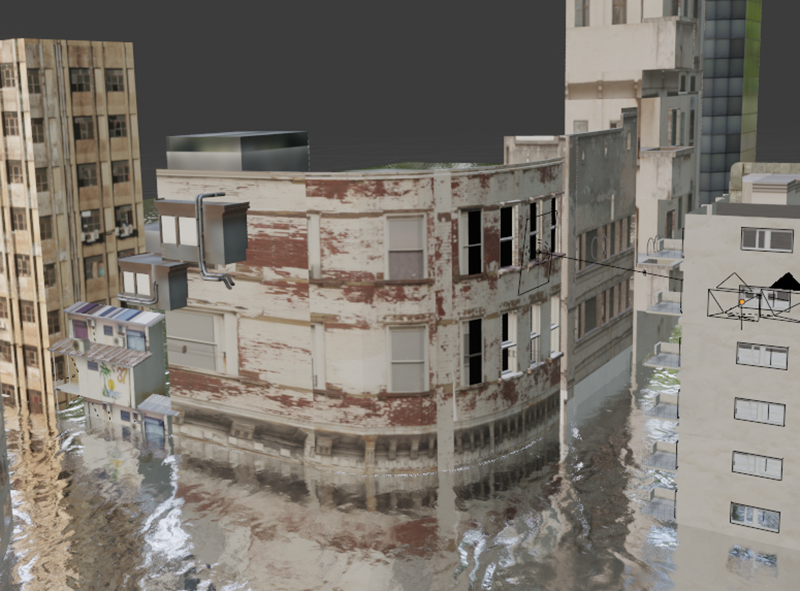
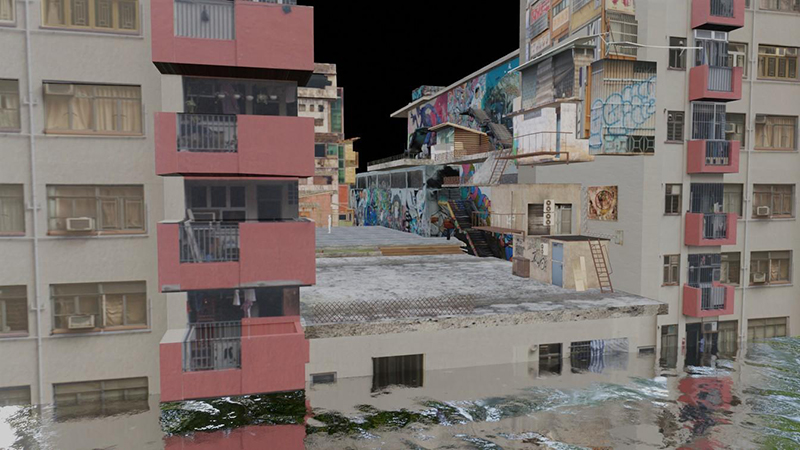
The Walk is a three-minute CGI and visual-effects-based short film that follows a character as he travels through a dystopian city affected by rising sea levels. As people adjust to their new lives, they survive on boats and in cities built above the water. The plot revolves around a single main character, a musician who is making his way through the vibrant and colorful city.
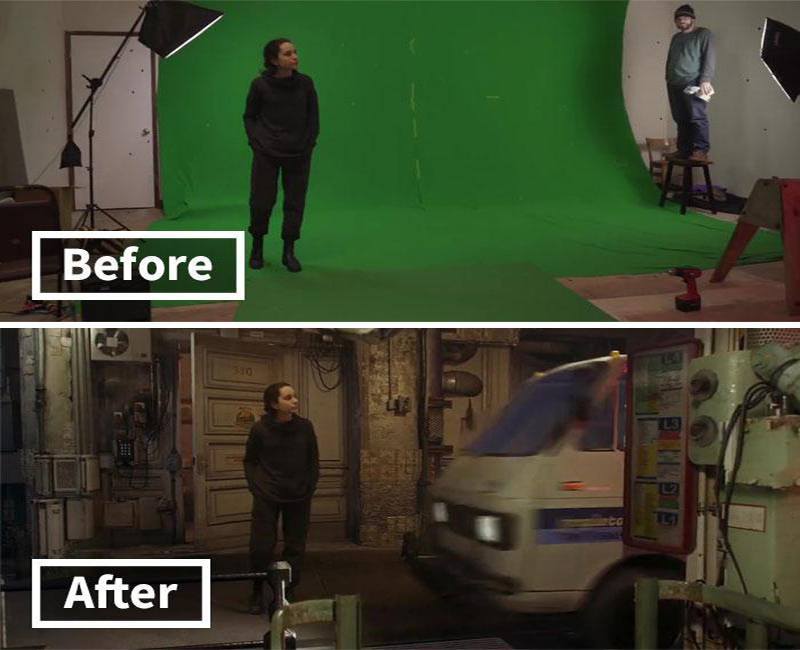
The project was inspired by Dynamo Dreams, a recent short film released by Ian Hubert, a well-known VFX artist. He created a short film that was vibrant and well-crafted, and he was able to seamlessly incorporate real-life elements into a completely CGI environment with cameras in 3D space.
Process
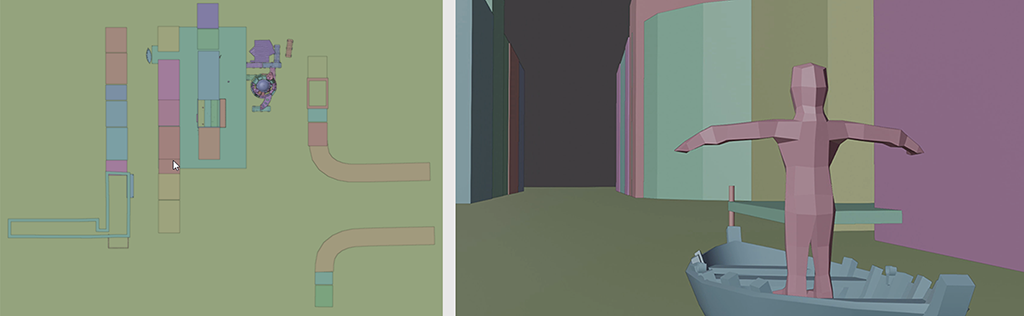
Script, Environment, and Previz – After writing the script, I did a rough block out of the environment in which the story would take place. This was just so I could have a clear visual image of what the world would be like and then finalize the camera angles. I decided to challenge myself with a few shots that were a little more technically difficult to execute.
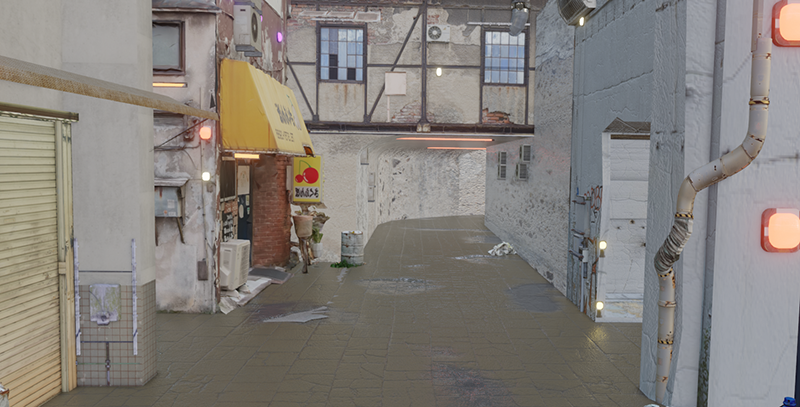
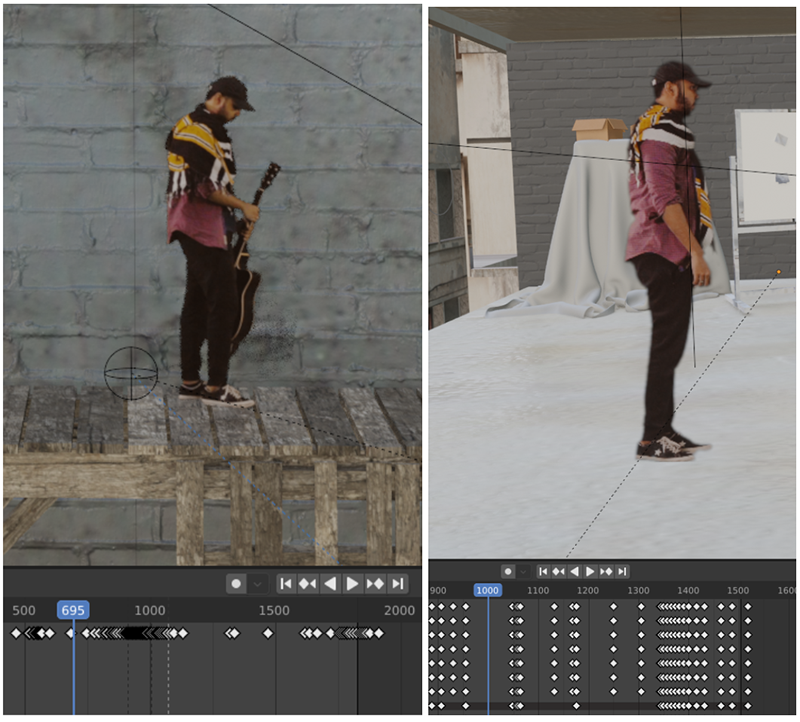
- The first shot was the walk through the apartment. My plan for this shot was to have the actor walk backward on the set after reaching the end which I would later cut out and stitch in post-production, and key-frame them in 3D space to give the illusion that he is in a much longer space. I blocked out the cut points to be hidden behind the walls so they would not be visible.
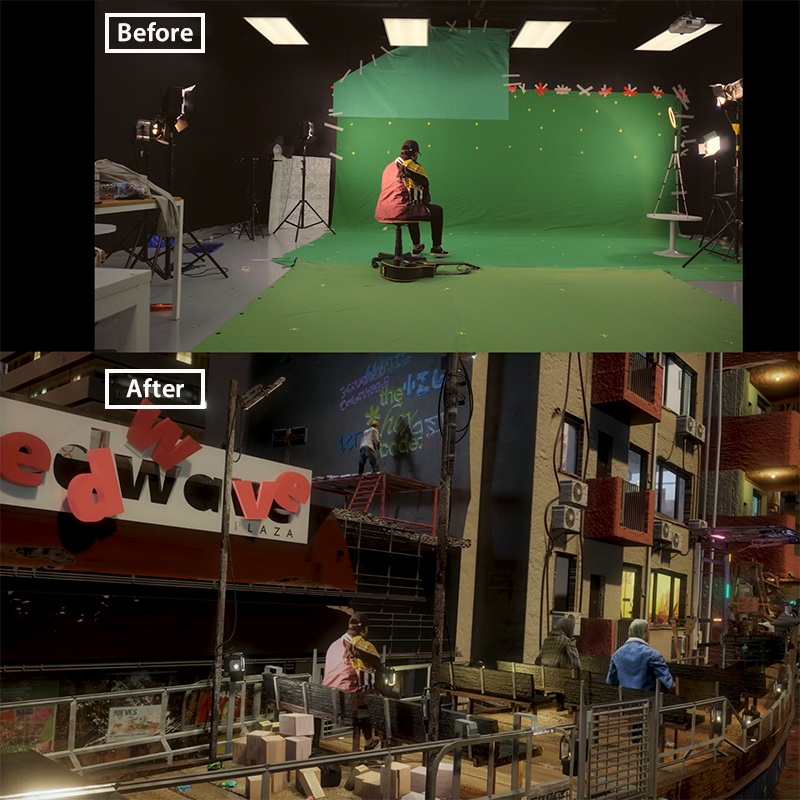
- The second point was where the character was seated on the boat. I wanted to add a camera rotation at this point, but I wouldn’t be able to do so due to a lack of space on set. The plan was for the character to rotate on set, on a chair, that would later be parented to the main camera. Technically, if I rotate the camera and the image plane at the same rate as the character, they should cancel each other out and create the illusion of a camera rotation.
Green screen Setup
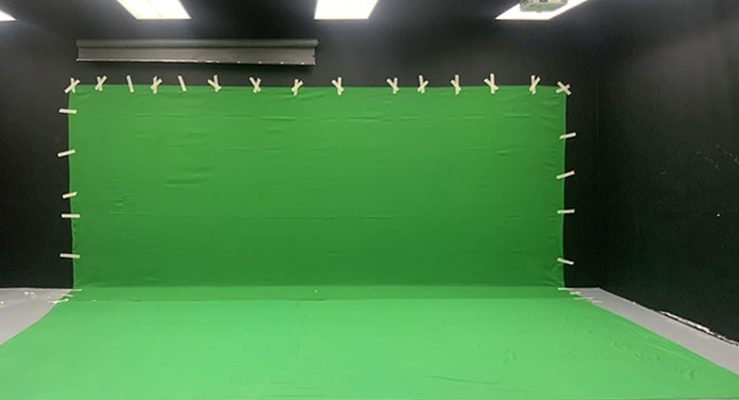
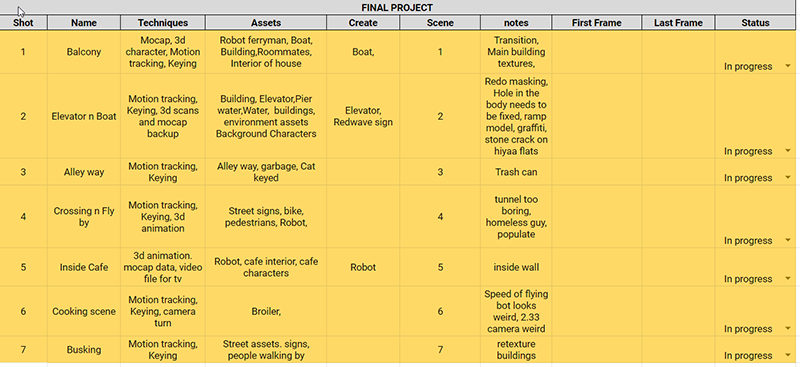
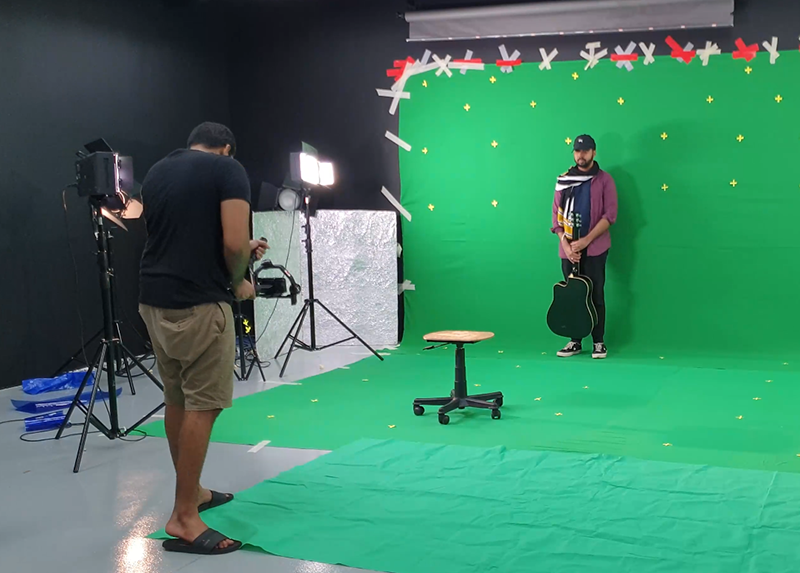
Before shooting, I broke down the script into different scenes. This allowed me to make the necessary changes to the script while also getting an idea of how each scene would play out. The next step was to get the set ready — this included the green screen setup as well as the lighting.
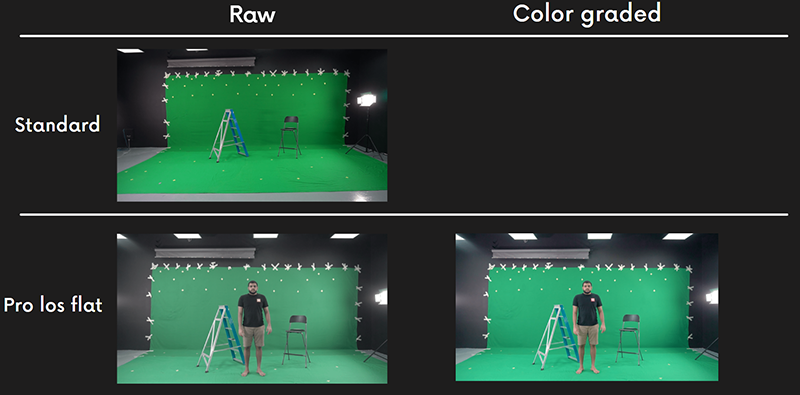
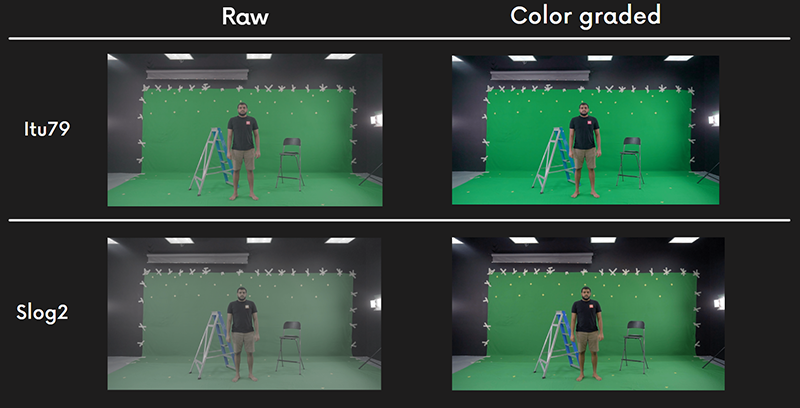
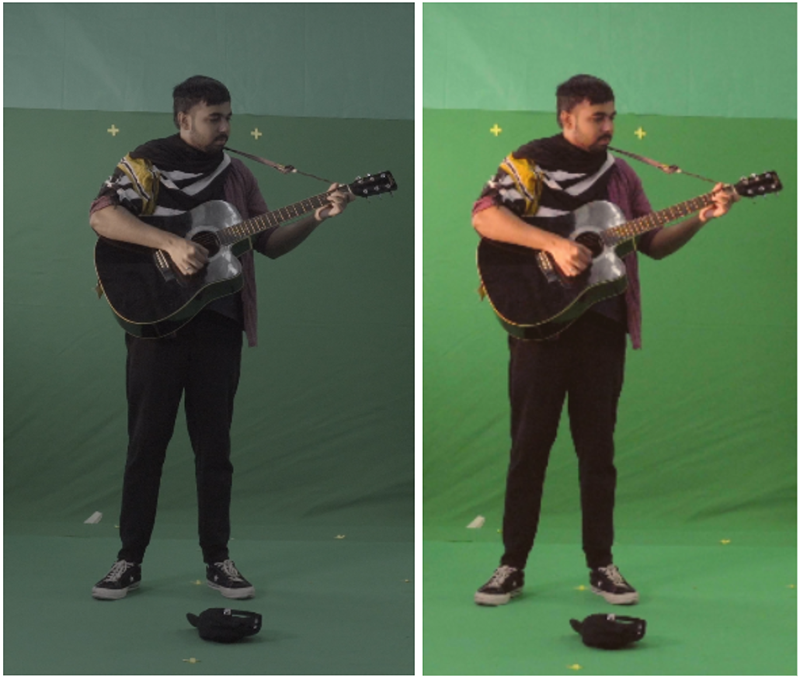
Camera settings – The camera setup came next. Because I had never worked on a green screen project before, I spent some time researching the various settings that would be best for my film. Color profiles, ISO, aperture, focal length, and so on. For this project, I decided on using the SLog2 color profile as it captures a dynamic range of colors allowing for more control during the color correction stage. After I tested it with different light settings I finalized the following setting for my film.
- Lens 16 mm
- Frame rate 23.98p
- ISO — 1000
- Aperture .F5.
- Shutter speed 1/25
- Quality — 4K
These produced the best results for me. The 16 mm lens provided me with a wide frame, allowing me to photograph a larger area. The ISO and aperture were set so that my subject was properly exposed and had less grain. I set my shutter speed to the lowest possible setting to reduce motion blur as much as possible. Having the proper settings was critical because it would ensure that I would not have any issues with keying or motion tracking later.
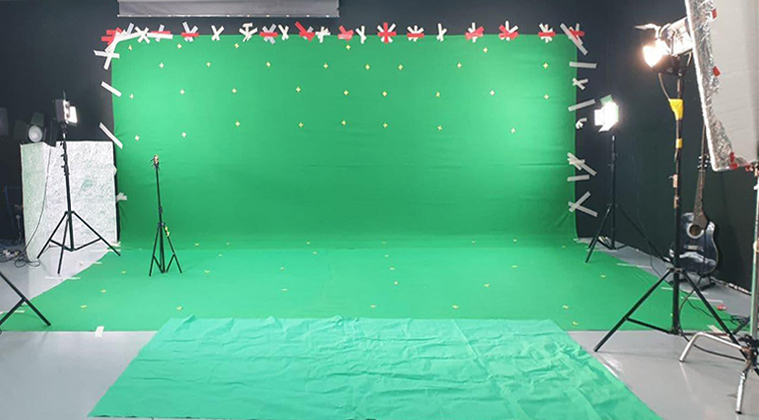
Motion tracking and lighting – When shooting on a green screen, it was critical to have even lighting over the entire screen, and to keep shadows to a minimum. For this, I had to prepare a variety of lighting setups for each scene. I kept two lights behind the actor that would not be moved so that the green screen would be lit evenly. I also used two different colored lights to highlight the characters.
Production
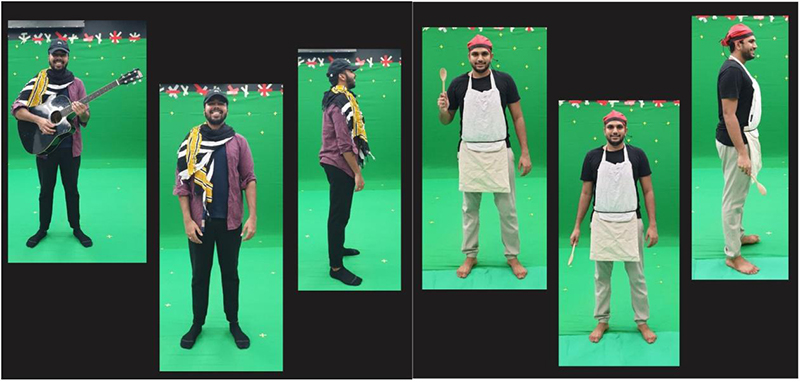
Filming – I had scheduled 15 days for filming, which included finalizing the characters’ costumes, going over the scenes with the actor, and finally a few days in case any scenes needed to be redone. The main shooting of the film took only three days after the costumes were finalized. I then went on to run some tests to see if any shots needed to be re-shot.
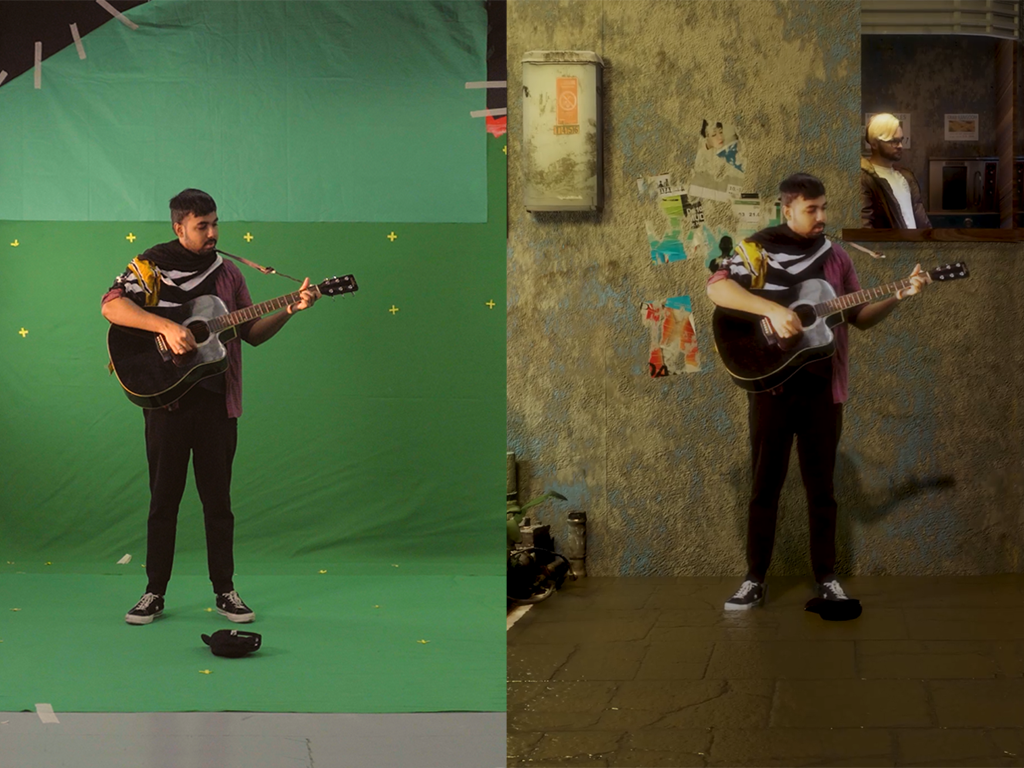
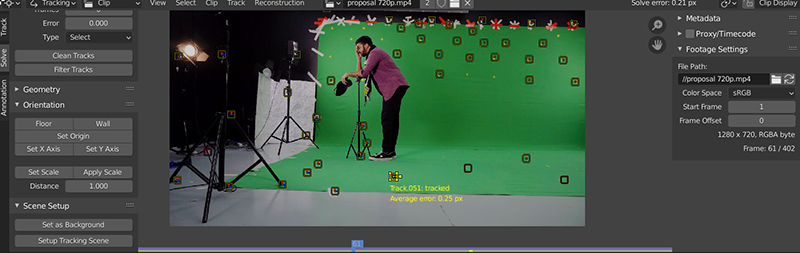
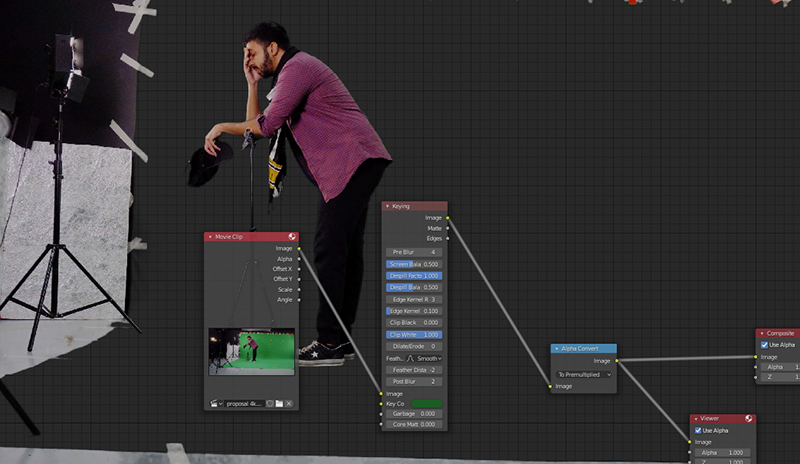
Color correction, motion tracking, and keying – After color correcting the footage in Premiere Pro it was now time to start tracking my shots. I brought my shots into the blender and tracked them. The tracked shots were then taken into the compositor for keying. I used blenders keying nodes to key the green screens. I had to create masks for the best result. The garbage mask removes all of the unnecessary items from the scene. The rotoscope mask was only required for a few scenes, and I created one whenever a keying issue was visible. Then I moved into masking, and created a rough rotoscope of the character’s interior to prevent the keying from entering the character.
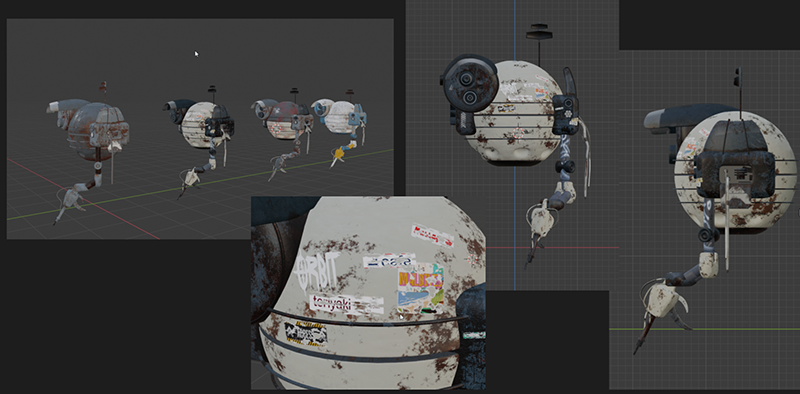
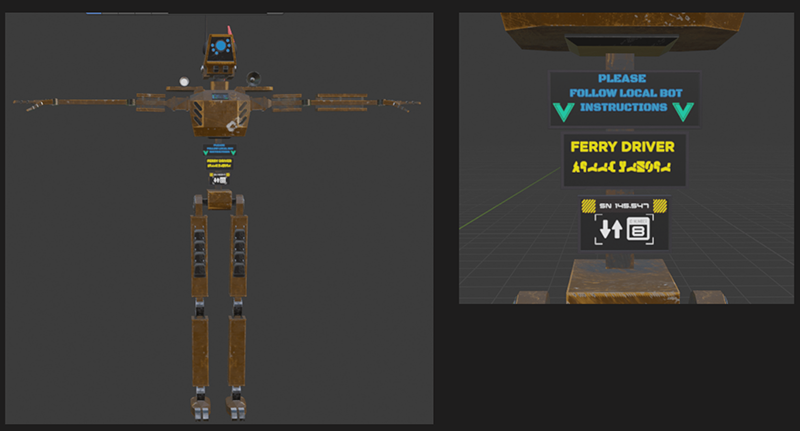
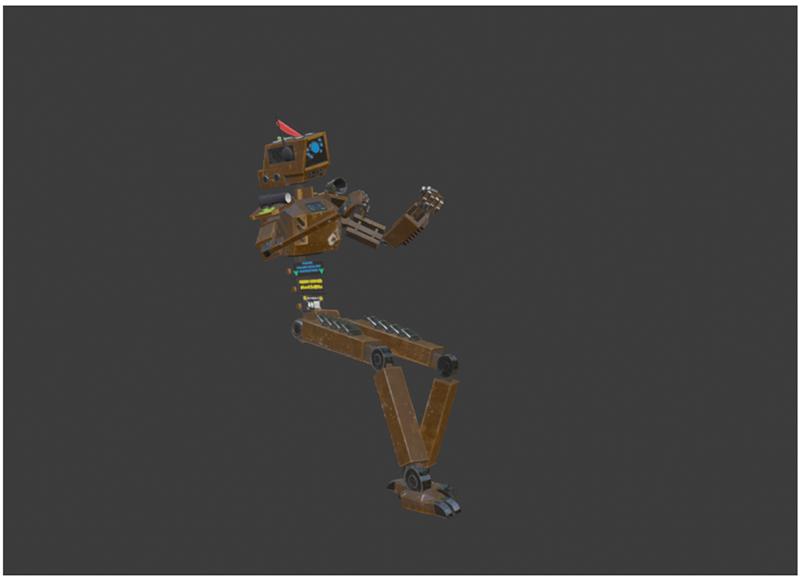
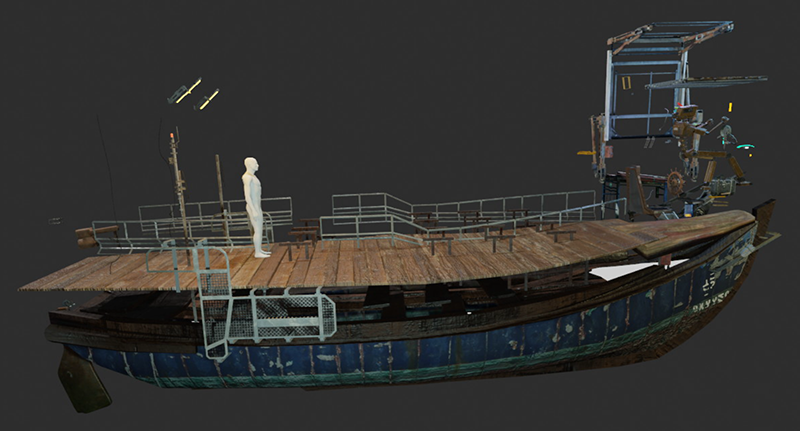
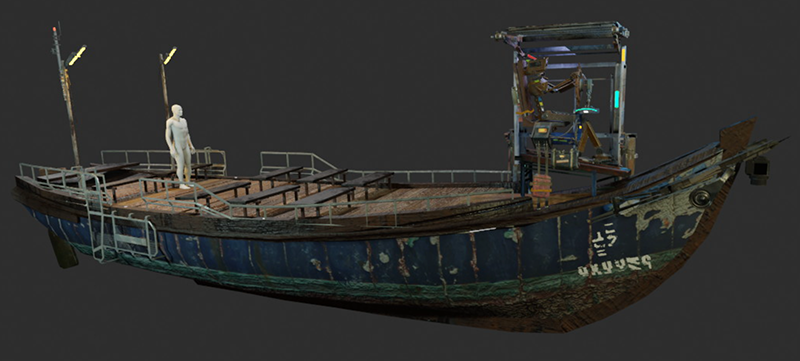
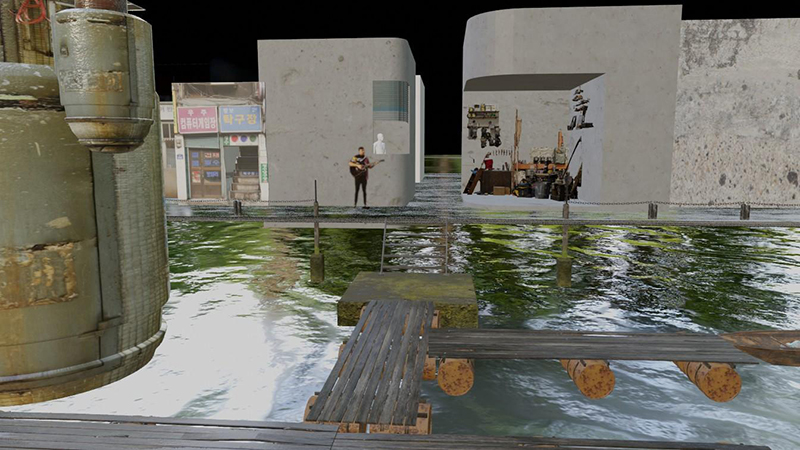
Assets preparation – I had three main assets in mind when I started prepping my film for production: a boat, two robots, and an elevator. Due to time constraints, I was unable to create every single detail of the model and instead I kitbashed the parts from various models and assembled them for my assets.
Bringing footage and camera into the scene
The keyed footage was then brought into the scene and parented with the motion-tracked camera. I placed the character in the correct positions in the scene using the rough block outs of the environments I created earlier.
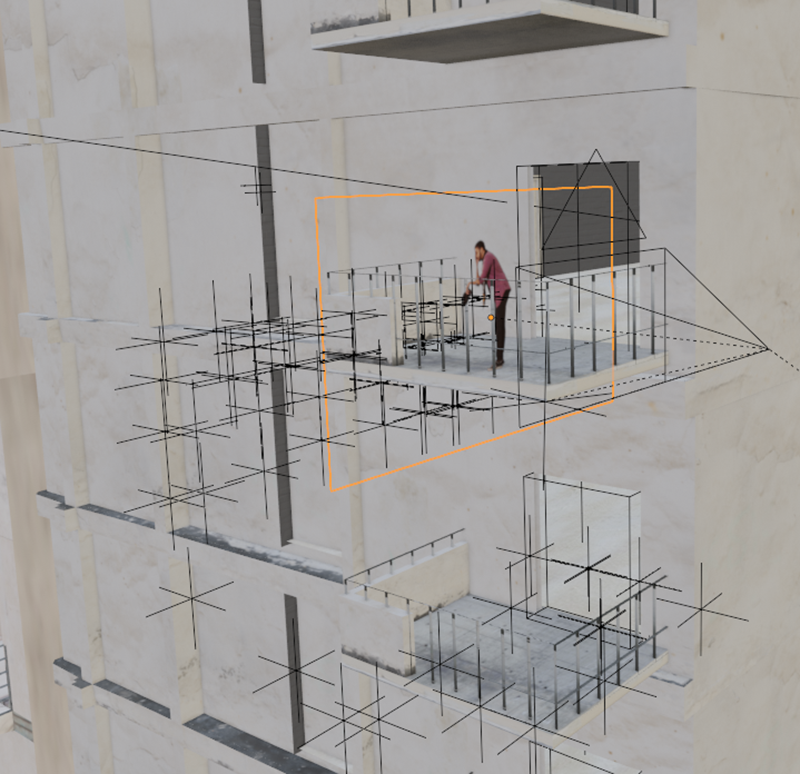
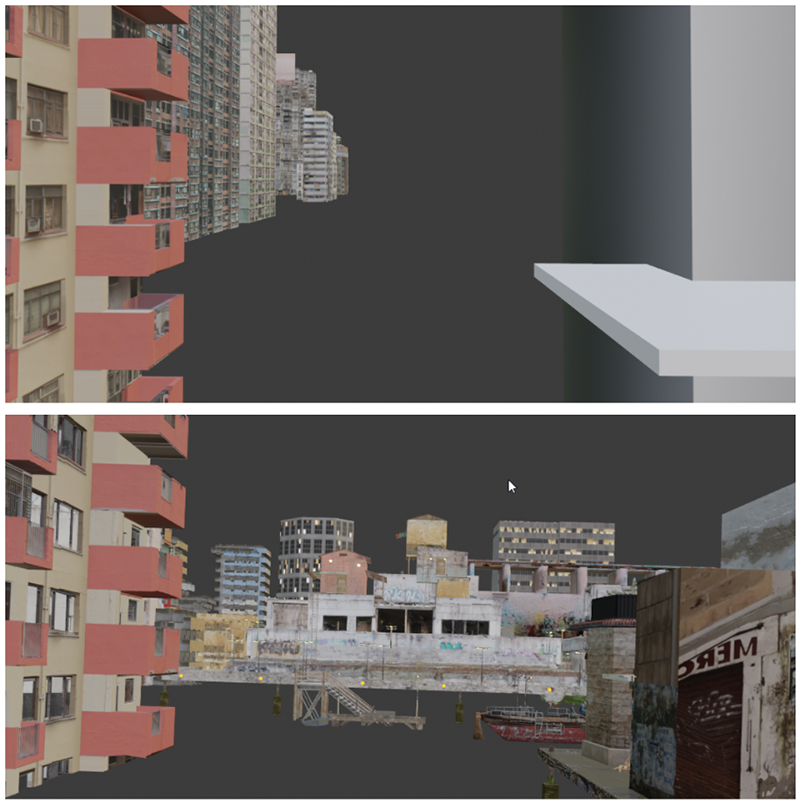
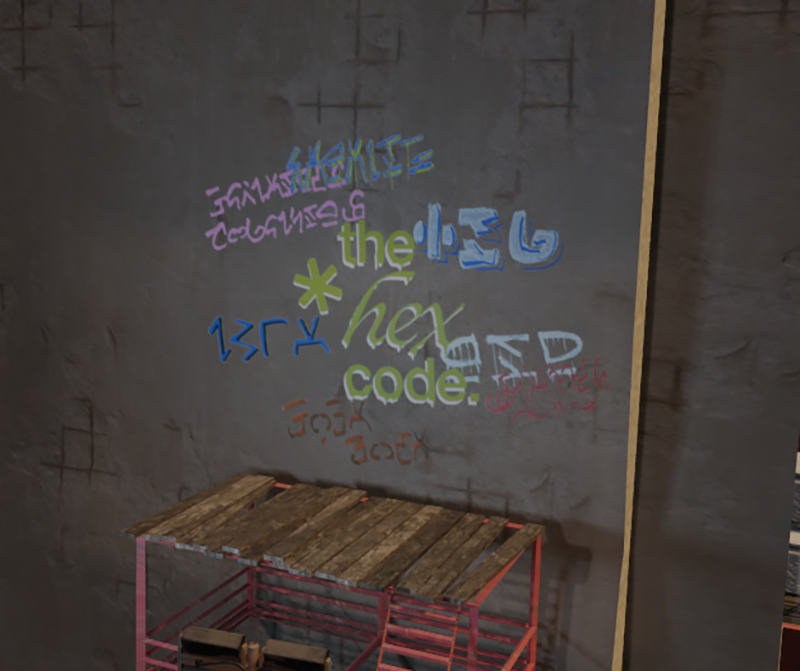
Environment building
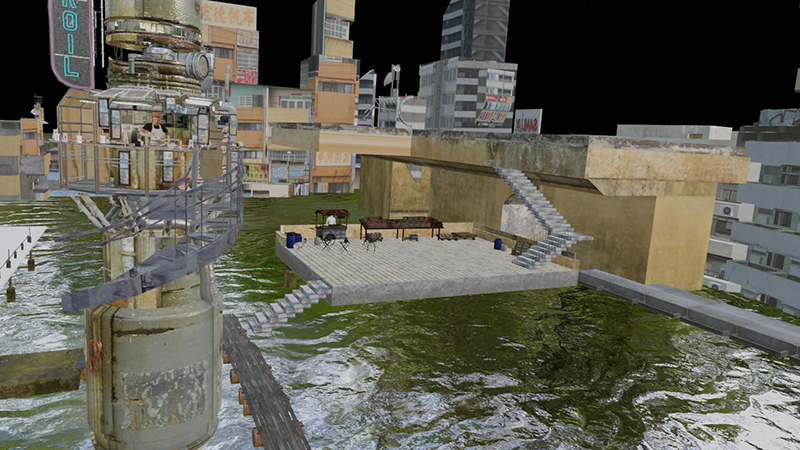
Using the characters’ positions and camera movement, I began to build a more detailed environment. At this point, I was using texture-based modeling, which is essentially image-based asset creation.
I sourced my textures from Textures.com and simply extruded parts of the buildings to match the texture as closely as possible. I then used the UV maps to fix and adjust any stretching or imperfections in the model. I used this method to create the majority of my scene. To save time, I also imported a few building models from Sketchfab and Ian’s Patreon for some of the close-up shots. I tried to include something interesting to see in each scene and make the space appear large and populated.
Adjustments to the character positions
Some of the scenes where the characters were gliding or sinking into the floor contained errors. These issues primarily arose in Scenes 1 and 2. I had to manually adjust each keyframe in order to do my best to get the characters’ feet lined up correctly for all of the scenes.
into the floor.
Environment changes
After completing a draft version of the scene, I consulted Mr. Mike who suggested covering up the characters’ feet. He also advised me to include something more interesting in the first shot to pique the viewer’s interest. The scenes require more detail in the background, so I began to construct more buildings for better composition.

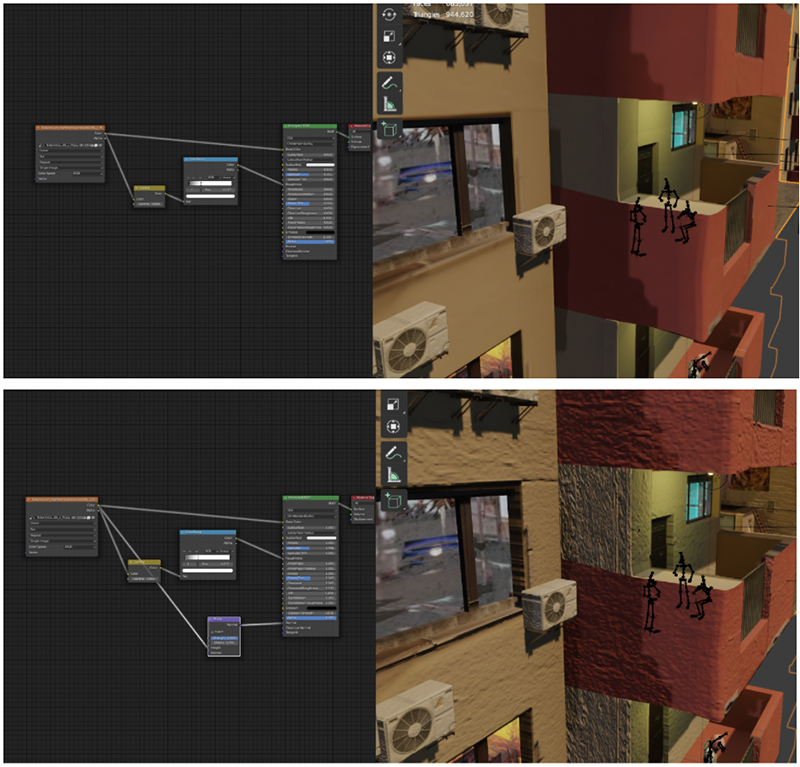
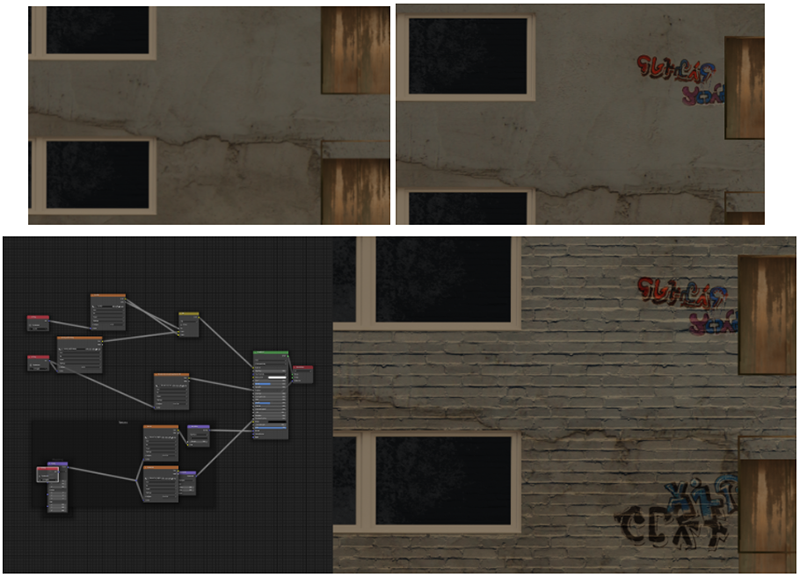
Re-texturing and adding details
At this point, I also began re-texturing all of my buildings. Because I had only used images to construct the buildings, the majority of them lacked details. I had to go in and add grudges and roughness to the buildings to make them look more realistic. This was accomplished with the help of the blender’s nodes.
Lighting
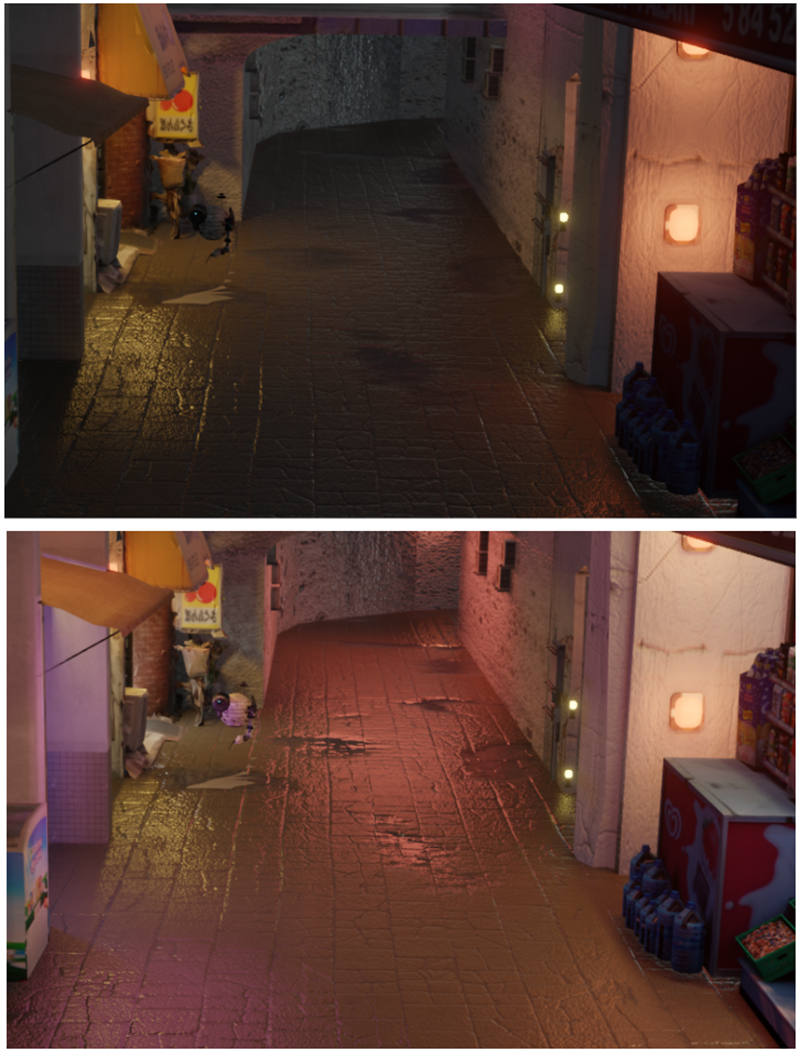
I was using Eevee to render out my scene and because of this I had some lighting constraints. Evee does not use path tracing, so it is unable to capture realistic light bounces. To compensate, I needed to add irradiance boxes, which calculated and faked bounce lights, but I had to be careful with them because they would significantly affect rendering time. I was also limited to only 128 lights per scene when using Eevee, so I had to plan ahead.
Lighting, in my opinion, is one of the most important aspects because it brings the scene to life. Furthermore, proper lighting would be required to make the character fit into the scene. I began by placing lights near the character, attempting to match the location of the lights on the physical set as closely as possible. To separate and add depth to the scene, I used a combination of orange and purple lights. I also added highlights in post-production, to direct the viewer’s attention to specific areas of the scene.

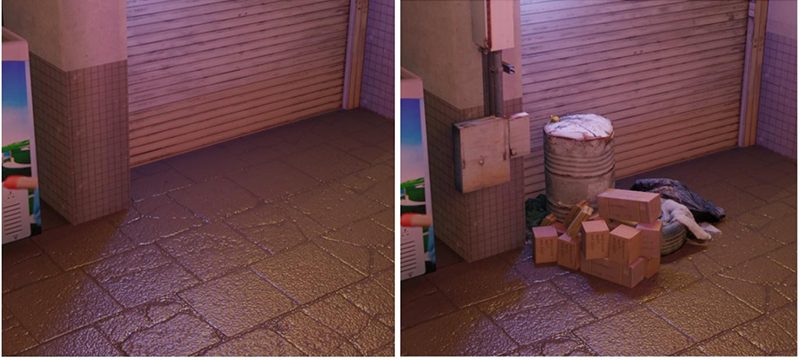
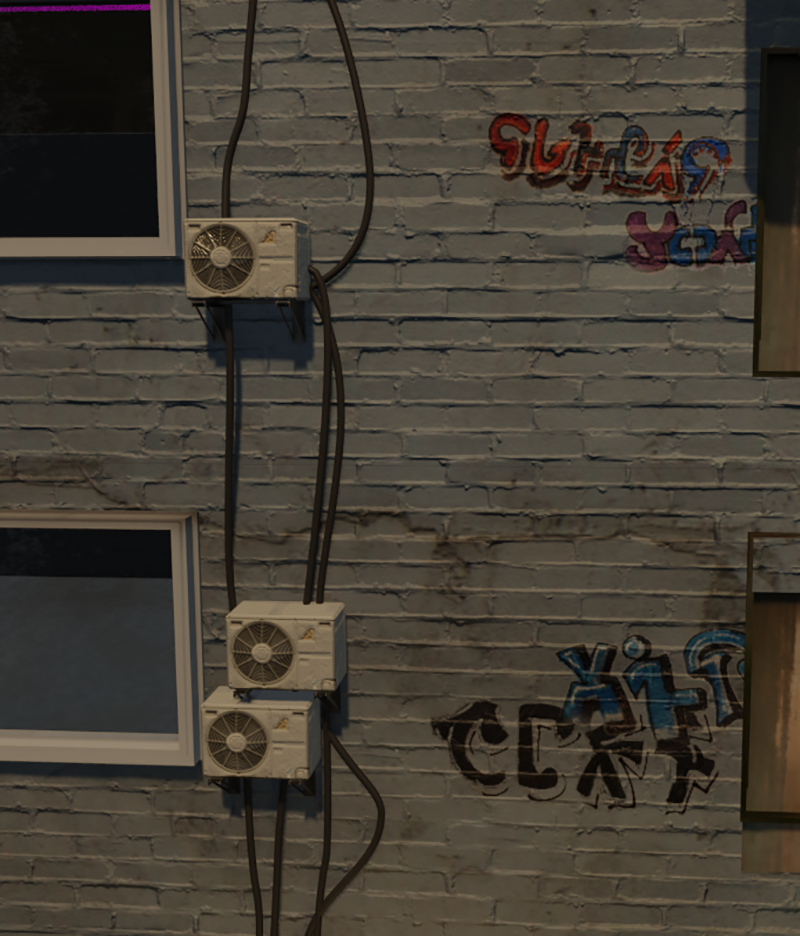
Adding details
It was time to add some details now that the environment had been completed. The majority of the details came from Ian Hubert’s Patreon. Garbage bags, boxes, and other such details are scattered throughout each scene.
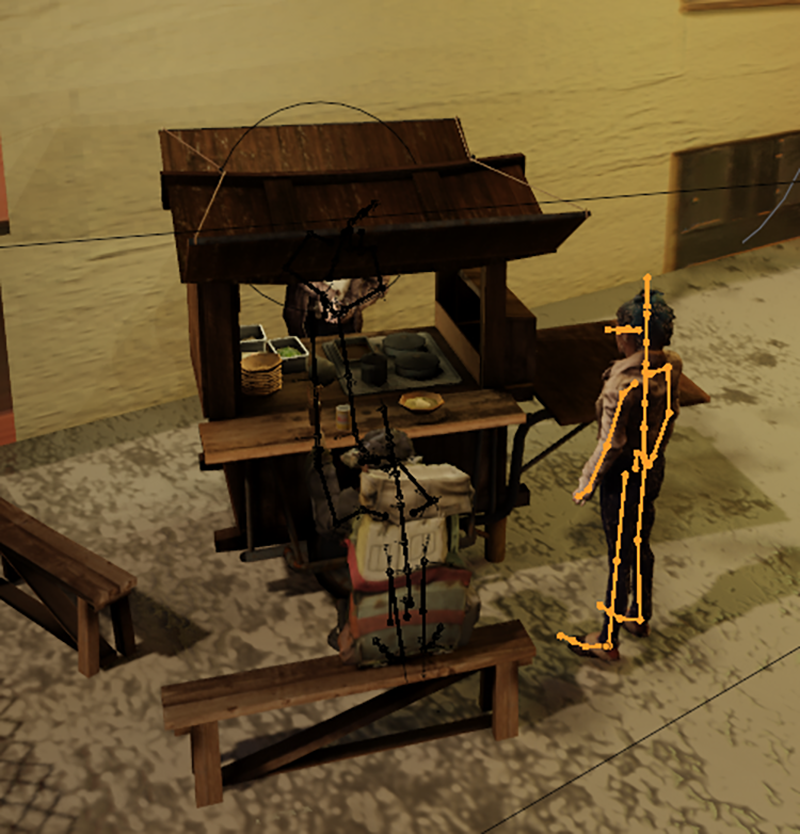
Crowd Simulation
I created a particle simulation of crowds of people in the market and open areas using Ian Huberts’ crowd assets. I struggled a little with these simulations, trying to place them in the correct position and doing my best to avoid any physics simulation glitches. I also had little control over where and how individual people in the crowd moved, so I had to simulate them several times before I got the perfect one which I baked and saved to my scene. I created a total of six crowd simulations for various scenes in this film.

3D Characters
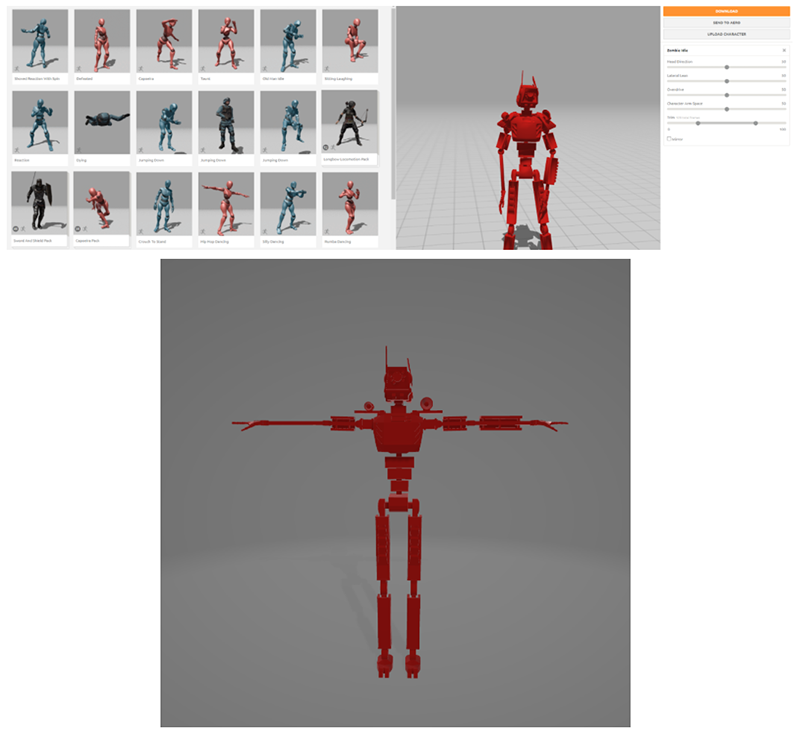
Ian Hubert provided all of the assets for the characters in my scene. I had intended to use some of the ground footage in the skies, but I didn’t have enough time to key out each character. The 3D character assets were rigged, making it easier to add animation to them. For some, I simply used Mixamo animation, while for others I used Mocap data. I couldn’t find any looping animations, so I used non-linear animations in blender to add repeats and make them appear to be looping.
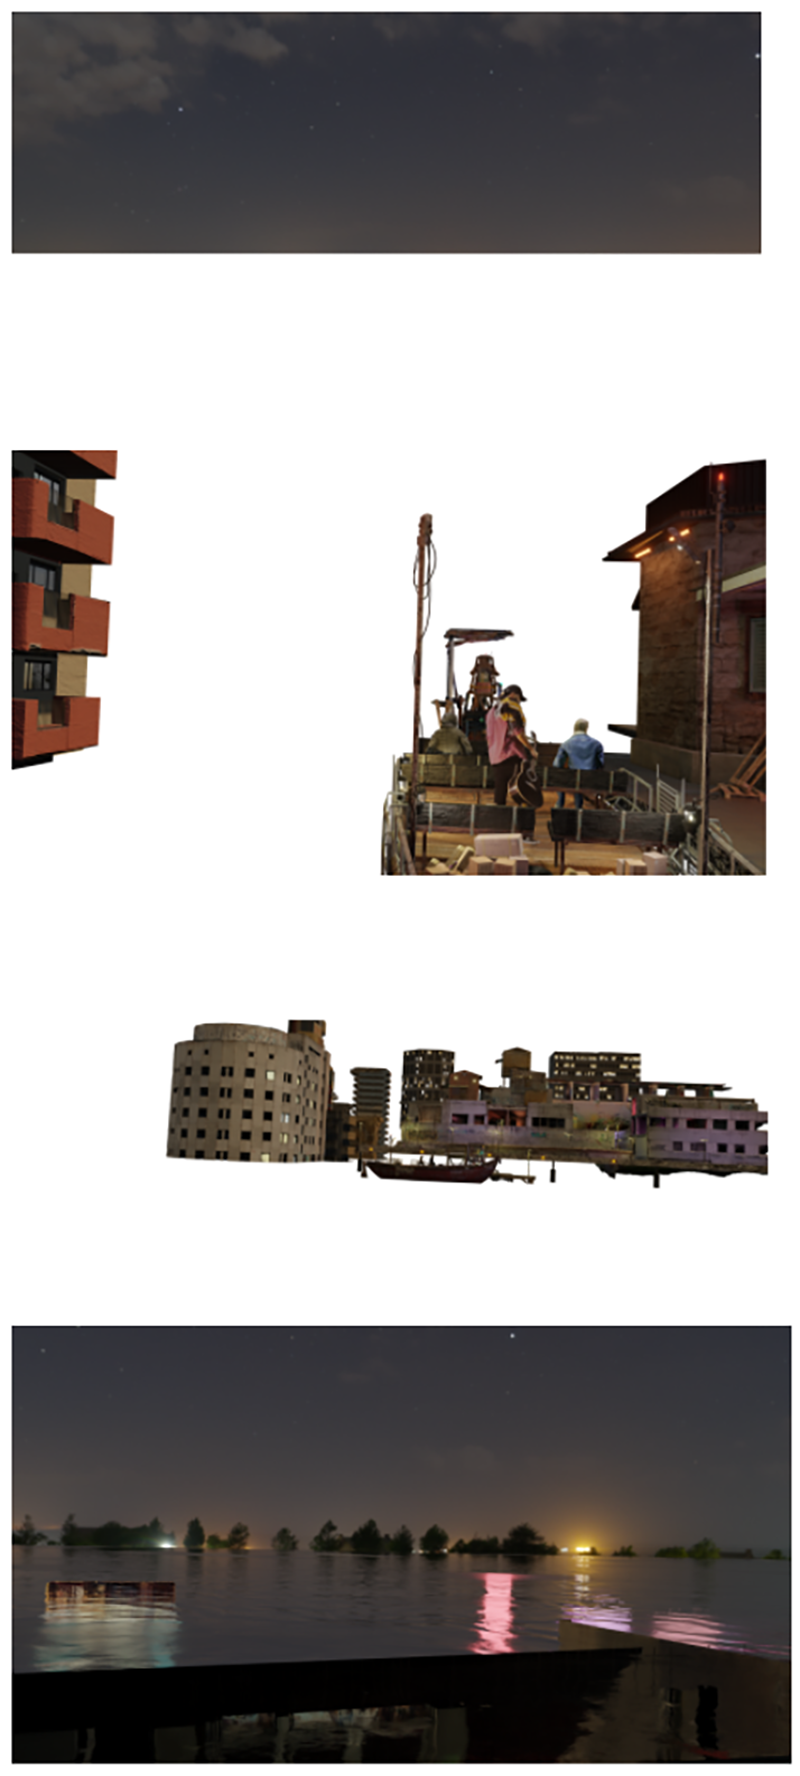
Rendering
I divided my scenes into layers for rendering, which I then composited to form the final image. Because I was now working with layers, I had to render out my ocean in cycles since Evee does not capture just the light and shadows of an object without rendering it.
Here are some rendered layers before compositing:
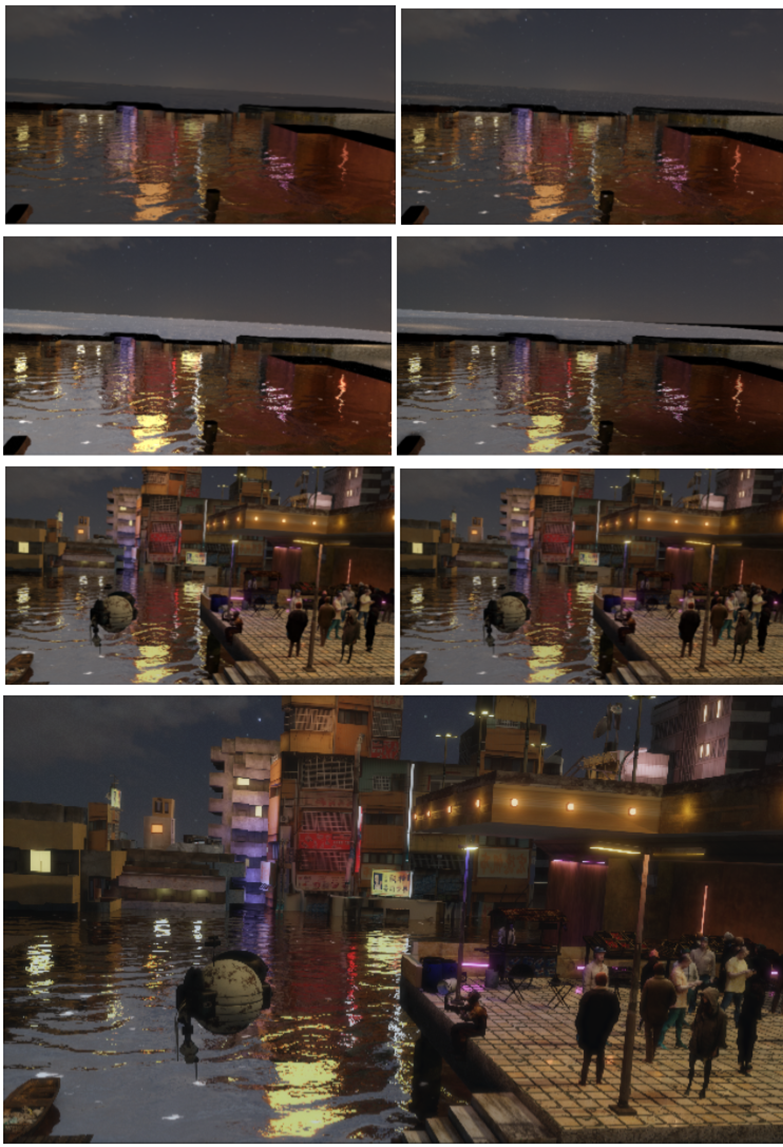
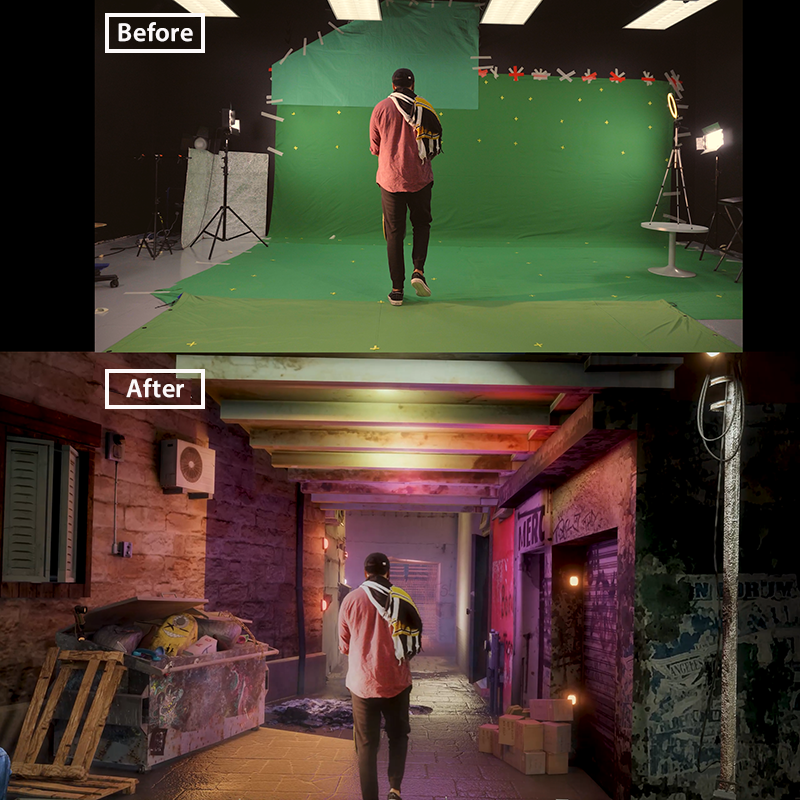
Compositing and color grading
I used After Effects to do my compositing. Here, I used the various passes I rendered out to fine-tune the final.
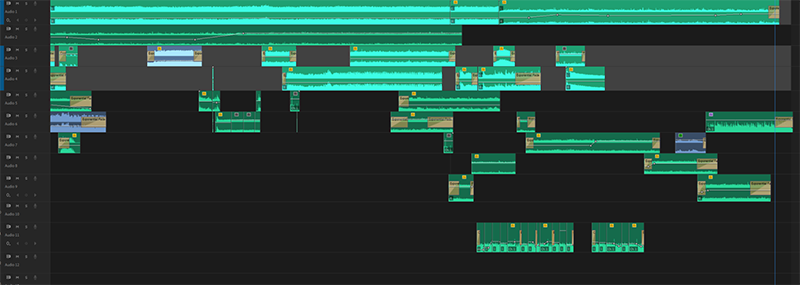
Sound design
The sound design was the final step in the process. I kept the film’s sound design as simple as possible. I plainly layered various sounds from Epidemic Sounds and YouTube in Premiere Pro and added in fades and audio gains to smooth them out.
In conclusion
This was my first green screen and CGI project, and I learnt the bulk of what I did for it in just a few weeks before the semester started, and the rest while working on it. As a result of my lack of experience I ran into a lot of technical problems, particularly with the motion tracking, and I had to redo the process several times before I got it right. Throughout the project, I found myself continuously putting out fires that I could have easily prevented if I had been prepared or recognized that what I was doing would cause problems down the line.
However I really enjoyed the project and had a great time working on it. The assignment provided me with a deeper grasp of the process of creating CGI films. I learned so many new techniques and got to experiment with different equipment and tools during the process. But the biggest takeaway for me personally is realizing how much I enjoyed doing 3D and Vfx work. This excites me and I can’t wait to learn and see what more I can create with it in the future.