
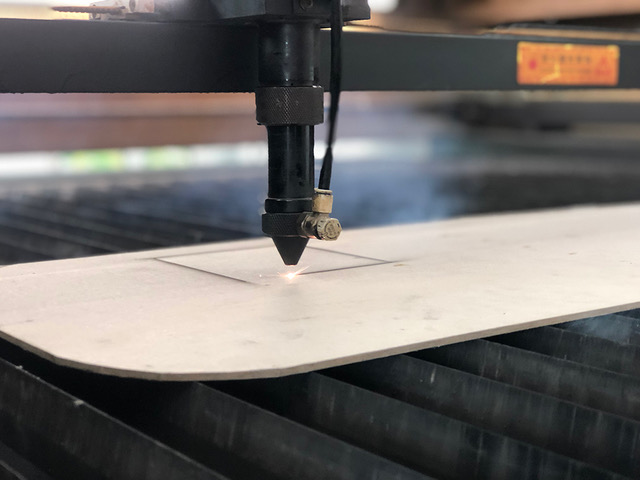
I stepped into the room and noticed a burnt smell then heard a buzzing, felt air pressure, and saw a mechanical movement. That was the sound and sight that greeted me when I first met the flatbed device that is about the size of a small car, but half the height. It was a spectacular light show hovering on top of some materials that was too bright for me to recognize. I was then informed by the caretaker that this device is a Laser Cutting Machine.
Laser somehow triggered a sense of danger in my mind — all those pop culture shows i.e. movies and TV programs where lasers were used as lethal weapons. I clearly remember also seeing a documentary YouTube video of a fictional laser and a real laser at a workplace. Obviously, the once industrial, expensive, and dangerous device, only available to some, was now available right in front of me in the university research lab.
Not literally of course, but through a file format called DXF version 2000. The setup consists of a laser machine connected via network and USB cable. How do I get started? Like all design processes, I had to have a design ready; this is normally done with Autodesk, AutoCAD or Adobe Illustrator. Settings use millimeter (mm) and RGB color profile. I then carefully plotted all the paths in the computer through the tools. I had to make sure all of the files were ungrouped so that there were no compound paths. In other words, all paths must be independent or a closed loop. Next, I then could export to the DXF file version 2000 to be imported into a program called LaserCAD. From LaserCAD, I made a few settings and then adjusted the speed and intensity.
Fortunately, all these details were written on a whiteboard near the laser cutter. The caretaker of the laser cutter showed me the process of taking a design from the computer to the laser cutting machine.
Then I heard BEEEEEEEP… that simply indicated the file was successfully transferred to the machine. The excitement of pressing the green GO button made me feel like a little boy playing with intensive-focused rapid fire. “Not so fast,” said the caretaker. First use the cursor key to move the laser nozzle location. “You need to make sure you align the laser nozzle and register it as a starting location by pressing “origin.” One more step, check to make sure you press “box”. This will make the laser nozzle move on top of your material as a box region of your work area. It’s like the laser cutting machine asking you is this the area where you set your material?
“Can I start now?”
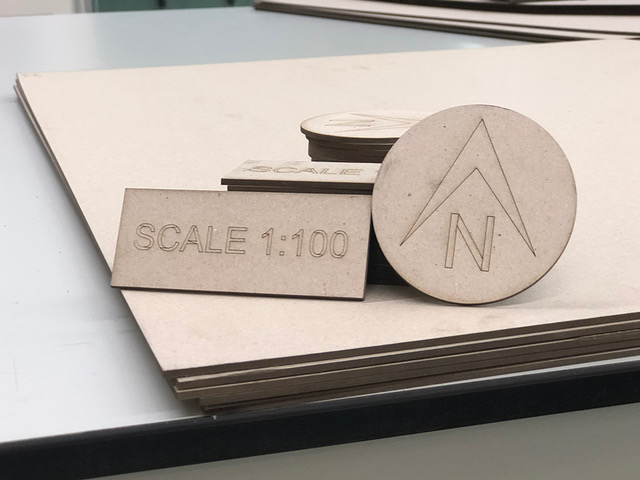
“Sure,” he said, “press start.” The laser nozzle started moving on top of the intended cutting area, following every curve and straight path, and burning the materials at the same time. I saw medium density foam (MDF) board being used for the first time, and later, I explored other materials that then meant finding the right setting between power intensity and speed of the laser nozzle movement. There it goes — cutting my first item on the laser cutter while I enthusiastically pointed my phone to record a video of the cut.
After that, I started to see how the machine worked and then started to get official training from the supplier so that I could take up the challenge of setting-up a booking system for students’ usage. In the meantime, I continued to explore the process using different materials, learning how to maintain the machine’s lenses, and how to clean the machine to achieve optimum cuts and prolong usage by minimising wear and tear.
As time went on, I started to experiment with different types of cutting settings. I would later simply call it a cut through, a light cut, or hatching. A cut through would be a setting where any materials with the thickness of 3mm would get a clean cut through since the power of the laser cutter is 100W, capable of cutting through materials around that thickness. A light cut is where I could get a scratched effect — merely enough to leave a scratch mark but not enough to cut through. This is usually done by setting the power to 10% and high speed movement, whereas the hatching is done by repeating a defined area with a hatching effect.
Much of my time now is guiding and assisting students to complete their projects. Some of the challenges in their designs requires a collaborative effort of contemplation plus trial and error. Who knows what the future holds. Students who dare to try, dare making the cut.